
Chapter 1: Introduction to Python
1.5 Setting Up a Development Environment
There are several IDEs and code editors available for Python development. Here, we'll discuss setting up three popular options: PyCharm, Visual Studio Code (VSCode), and Jupyter Notebook.
PyCharm
Step 1: To download PyCharm, visit the official website of JetBrains: http://www.jetbrains.com/pycharm/
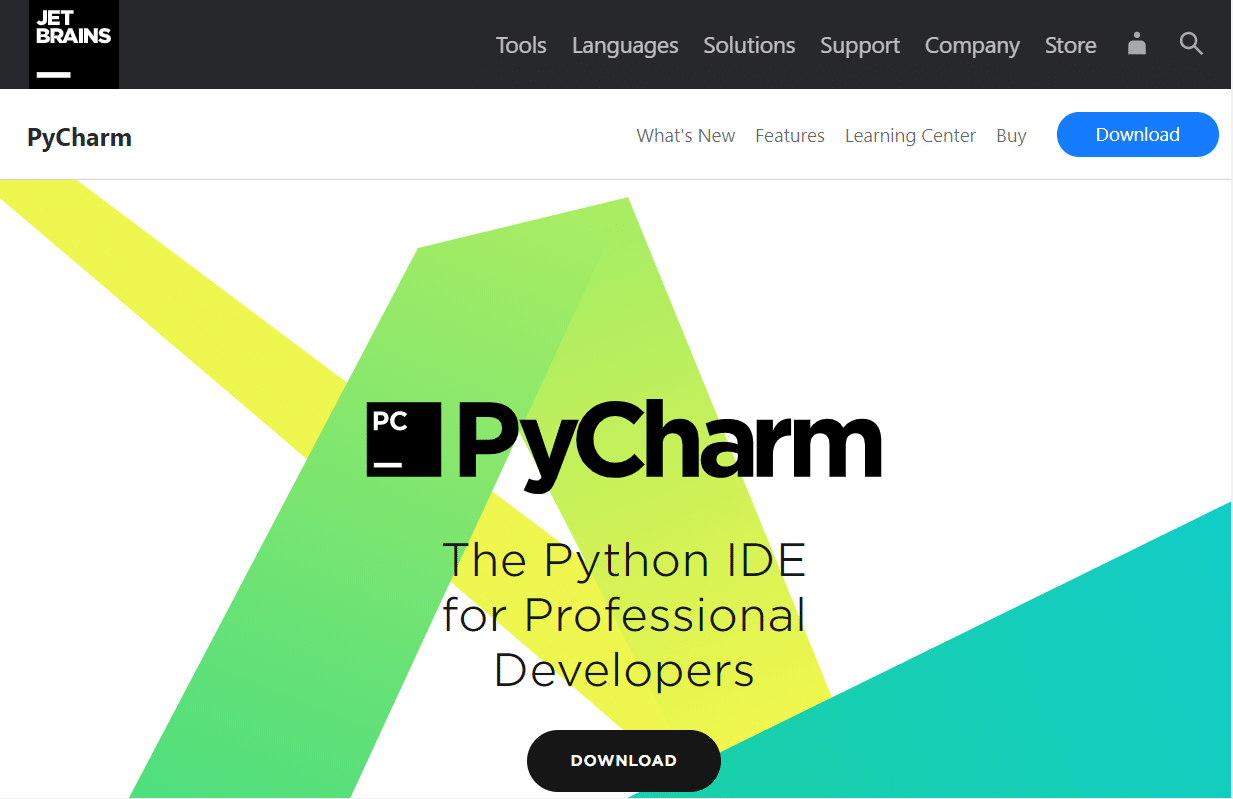
Step 2: Click on the ‘Download’’ button.
Step 3: After that, you will see the below window with two options, Professional and Community.
Step 4: Download the Community version.
Note: If you are interested to work with the Professional version, then you can download the Professional version and avail a free trial.

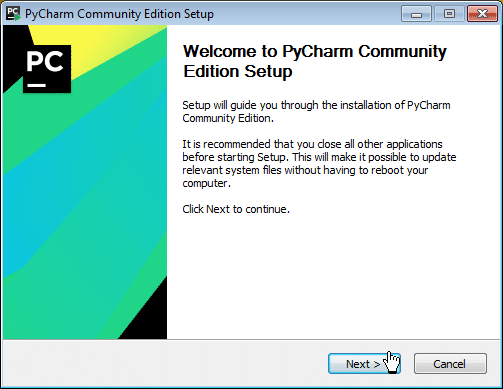
Step 5: After downloading the file, click on it.
Step 6: When the following window appears, click on Next and the installation process will start.
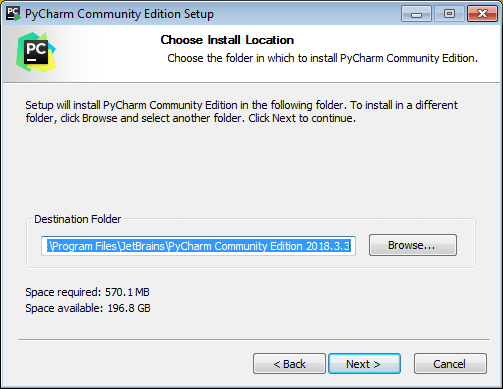
Step 7: After clicking on Next, first, a window for setting up the installation location will appear.
Note: You can either select a folder for the installation location or retain the default path.
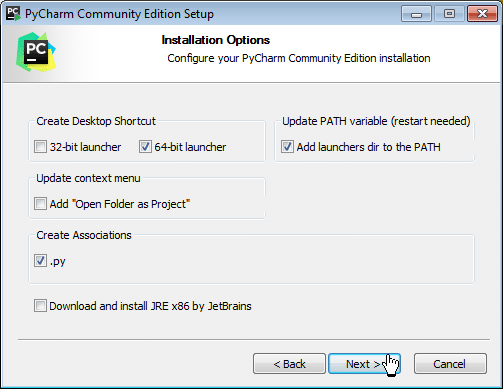
Step 8: In the next step, you can set the Installation Options as per requirements, and then, click on the Next button to proceed.
Step 9: Now, you have to select the Start Menu folder, or you can leave it as default.
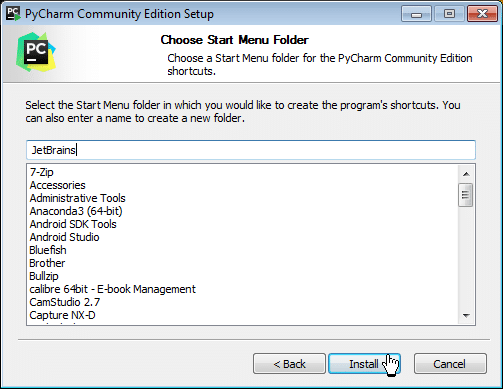
Step 10: After these steps, click on the Install button as above to start the installation process.

Step 11: When you click on the Finish button, your PyCharm installation completes.
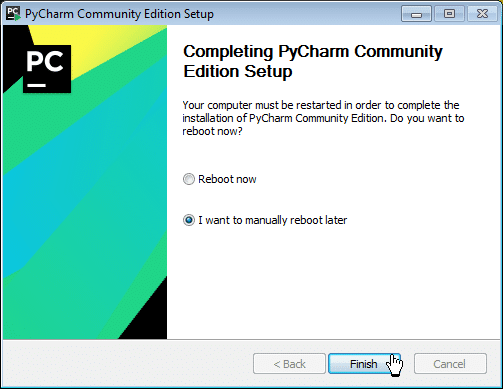
Now, you have successfully installed PyCharm and Python both in your system.
Configuring PyCharm
The first time PyCharm launches, it will offer you the chance to import older settings (from a previous PyCharm installation).
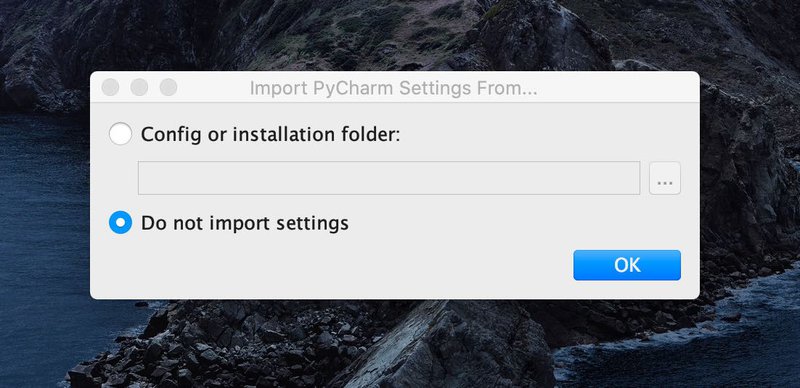
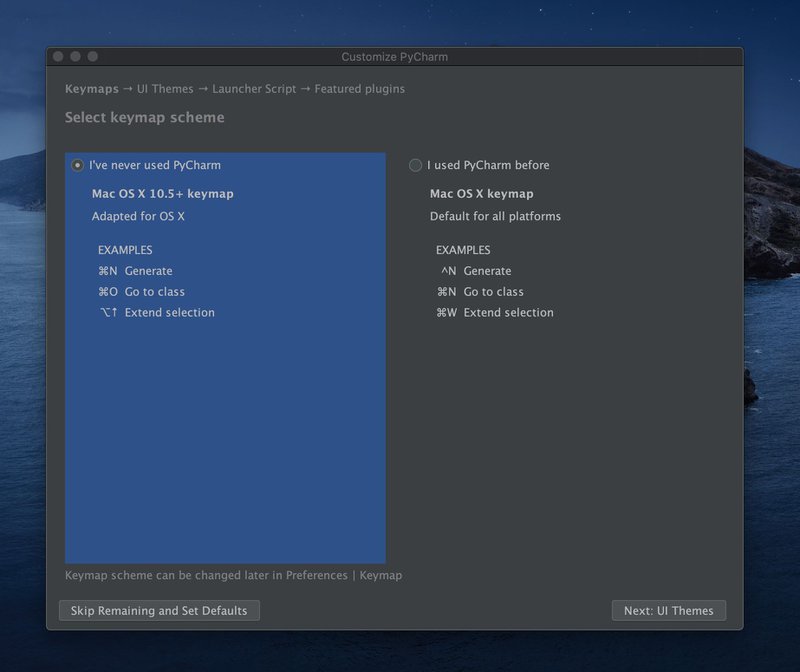
If you are installing PyCharm for the first time, you don't need to import settings. The next screen will ask you to customize PyCharm. The first question is to select a keymap scheme. Keymap scheme refers to keyboard shortcuts, check the different examples in the figure. You can leave it as it if you never used PyCharm before, and it is updated for newer Mac OS versions.
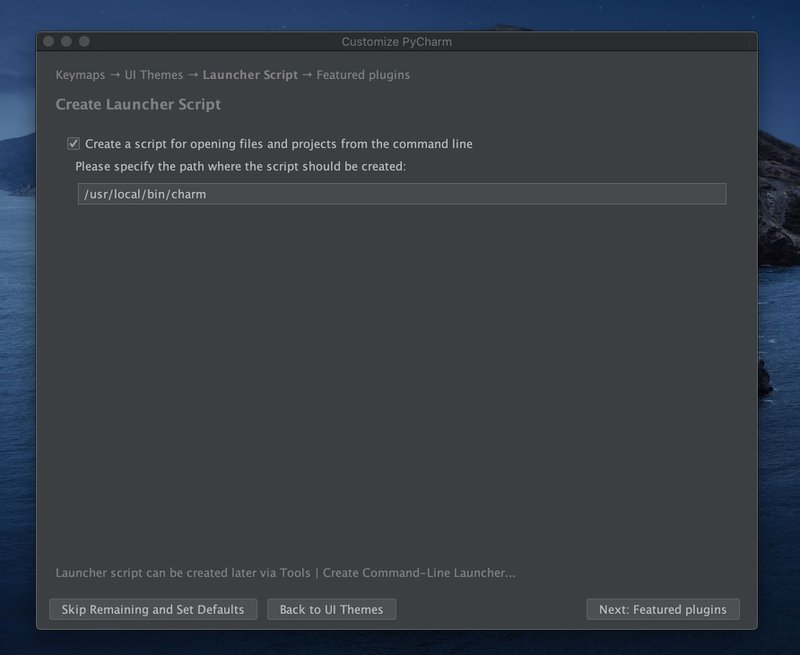
I click on Next: UI Themes. On the following page, I opted for the dark 'Darcula' theme. Don't be disappointed if you don't like any of the themes right now. Later you can add a plugin that allows you to choose between several other beautiful options 😍 (hint: it's a plugin called Material UI Theme). After you chose, click on Next: Launcher Script. A Launcher script adds a small terminal program that can launch PyCharm from your terminal in any given directory. What I mean is that it allows you to do the following:
charm ~/DeveloperProjects/MyNewPythonApplicationIn that line, I am launching PyCharm in the directory called 'MyNewPythonApplication' that is a sub-directory of 'DeveloperProjects.' If you like this feature, check the box. To continue, click on Next: Featured plugins.
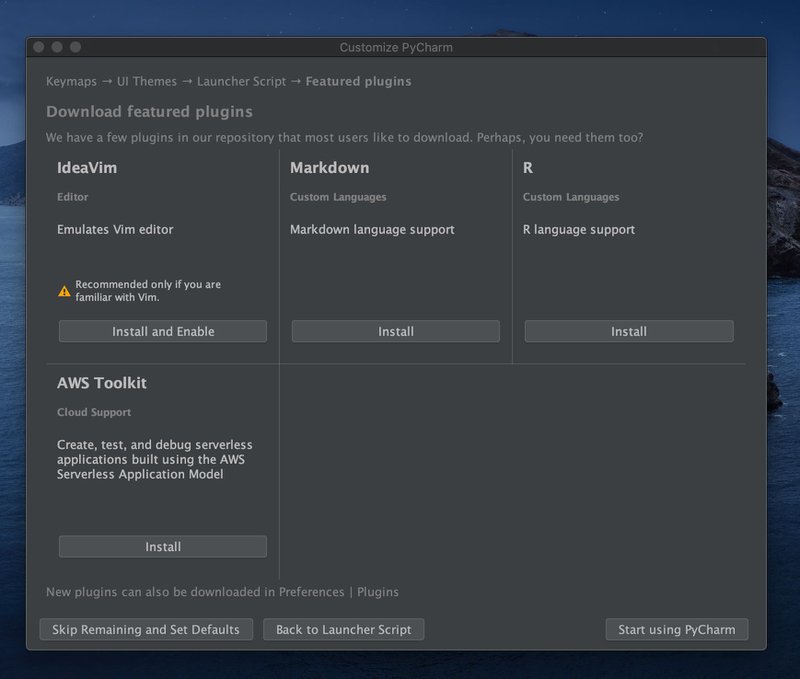
On the next screen, Pycharm suggests popular plugins. That's a personal choice. The configuration is almost ready, now click on Start using PyCharm.
Creating a new project in PyCharm
Now, the next step is to either open an old project (from a repository on your local machine or version control) or create a new project. Let's suppose you want to start a new project. Then, click on + Create New Project.

If you chose the professional version of PyCharm, you can select among several project options from the left sidebar. Or, in case you have the free version, you won't have these options, so you can only open a new Pure Python project. You can create a new project in the same way, though. Chose the location (directory) where you want to save your project.
By clicking on Project Interpreter: New Virtualenv environment, you can choose the environment options for your new project. When you are coding in Python, you will probably make use of several libraries. The environment will hold all the libraries you will install for that project. There are two options 1) New environment or 2) Existing interpreter.

The new environment (first) option gives yet three possibilities, Virtualenv, Pipenv, or Conda. Virtualenv is the default option. Pipenv is newer, and it is supposed to have extra functionalities. To make use of Conda, you need to have installed the Anaconda or Miniconda on your machine. You can use the default Virtualenv. Besides, you can choose the Base interpreter (Python 3 recommended). Click on Create to continue.
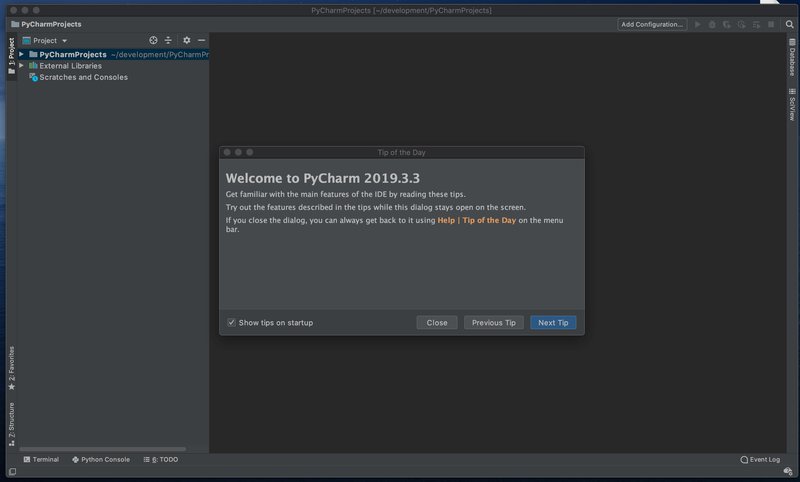
Before you can start coding, PyCharm suggests a 'Tip of the Day' option with tricks on how to increase your productivity by using keyboard shortcuts. If you think you don't need them, you can uncheck this option on the bottom left corner of the pop-up. After that, close the pop-up. Now you can create a new file by clicking Cmd + N (on Mac) or clicking on File > New > File or clicking File > New > Python File (from templates). If you chose the last option, PyCharm will create a file with the .py extension.
You can finally write your code! After you are ready, you can run your script by clicking Run on the main menu (the green arrow on the top right corner) or pressing Ctrl + Option + R on the keyboard. PyCharm offers several features to help you code.
1.5 Setting Up a Development Environment
There are several IDEs and code editors available for Python development. Here, we'll discuss setting up three popular options: PyCharm, Visual Studio Code (VSCode), and Jupyter Notebook.
PyCharm
Step 1: To download PyCharm, visit the official website of JetBrains: http://www.jetbrains.com/pycharm/
Step 2: Click on the ‘Download’’ button.
Step 3: After that, you will see the below window with two options, Professional and Community.
Step 4: Download the Community version.
Note: If you are interested to work with the Professional version, then you can download the Professional version and avail a free trial.
Step 5: After downloading the file, click on it.
Step 6: When the following window appears, click on Next and the installation process will start.
Step 7: After clicking on Next, first, a window for setting up the installation location will appear.
Note: You can either select a folder for the installation location or retain the default path.
Step 8: In the next step, you can set the Installation Options as per requirements, and then, click on the Next button to proceed.
Step 9: Now, you have to select the Start Menu folder, or you can leave it as default.
Step 10: After these steps, click on the Install button as above to start the installation process.
Step 11: When you click on the Finish button, your PyCharm installation completes.
Now, you have successfully installed PyCharm and Python both in your system.
Configuring PyCharm
The first time PyCharm launches, it will offer you the chance to import older settings (from a previous PyCharm installation).
If you are installing PyCharm for the first time, you don't need to import settings. The next screen will ask you to customize PyCharm. The first question is to select a keymap scheme. Keymap scheme refers to keyboard shortcuts, check the different examples in the figure. You can leave it as it if you never used PyCharm before, and it is updated for newer Mac OS versions.
I click on Next: UI Themes. On the following page, I opted for the dark 'Darcula' theme. Don't be disappointed if you don't like any of the themes right now. Later you can add a plugin that allows you to choose between several other beautiful options 😍 (hint: it's a plugin called Material UI Theme). After you chose, click on Next: Launcher Script. A Launcher script adds a small terminal program that can launch PyCharm from your terminal in any given directory. What I mean is that it allows you to do the following:
charm ~/DeveloperProjects/MyNewPythonApplicationIn that line, I am launching PyCharm in the directory called 'MyNewPythonApplication' that is a sub-directory of 'DeveloperProjects.' If you like this feature, check the box. To continue, click on Next: Featured plugins.
On the next screen, Pycharm suggests popular plugins. That's a personal choice. The configuration is almost ready, now click on Start using PyCharm.
Creating a new project in PyCharm
Now, the next step is to either open an old project (from a repository on your local machine or version control) or create a new project. Let's suppose you want to start a new project. Then, click on + Create New Project.
If you chose the professional version of PyCharm, you can select among several project options from the left sidebar. Or, in case you have the free version, you won't have these options, so you can only open a new Pure Python project. You can create a new project in the same way, though. Chose the location (directory) where you want to save your project.
By clicking on Project Interpreter: New Virtualenv environment, you can choose the environment options for your new project. When you are coding in Python, you will probably make use of several libraries. The environment will hold all the libraries you will install for that project. There are two options 1) New environment or 2) Existing interpreter.
The new environment (first) option gives yet three possibilities, Virtualenv, Pipenv, or Conda. Virtualenv is the default option. Pipenv is newer, and it is supposed to have extra functionalities. To make use of Conda, you need to have installed the Anaconda or Miniconda on your machine. You can use the default Virtualenv. Besides, you can choose the Base interpreter (Python 3 recommended). Click on Create to continue.
Before you can start coding, PyCharm suggests a 'Tip of the Day' option with tricks on how to increase your productivity by using keyboard shortcuts. If you think you don't need them, you can uncheck this option on the bottom left corner of the pop-up. After that, close the pop-up. Now you can create a new file by clicking Cmd + N (on Mac) or clicking on File > New > File or clicking File > New > Python File (from templates). If you chose the last option, PyCharm will create a file with the .py extension.
You can finally write your code! After you are ready, you can run your script by clicking Run on the main menu (the green arrow on the top right corner) or pressing Ctrl + Option + R on the keyboard. PyCharm offers several features to help you code.