Microsoft's Visual Studio Code, often abbreviated as VS Code, is a free and highly robust code editor that is renowned for its lightweight nature, making it ideal for developers across a wide range of disciplines. VS Code is a product of Microsoft's dedication to creating tools that enhance productivity and streamline the development process. Its feature set is impressively expansive, covering everything from support for debugging - a critical component in any development journey, to an embedded Git control that allows for seamless version control, making collaboration and version management simpler than ever.
Additionally, VS Code offers features such as syntax highlighting which can make reading and understanding code much more straightforward by visually differentiating elements. It also provides intelligent code completion, a feature that can save developers significant time by predicting and suggesting completions for partially written lines of code.
Furthermore, VS Code allows users to customize the editor's theme, enabling them to tailor the aesthetics of their workspace to their personal preferences. This not only makes for a more enjoyable coding experience but can also enhance productivity by creating a more comfortable and familiar work environment.
This detailed, step-by-step guide has been carefully crafted to walk you through the process of installing VS Code, regardless of whether you're using a Windows, Mac, or Linux operating system. The guide aims to make the installation process as easy and straightforward as possible, even for those who may be new to such tasks.
Prerequisites
Before we delve into the process, it's crucial to make sure you have everything you need to ensure a smooth and hassle-free experience. Here are the prerequisites that you should fulfill:
- A stable internet connection: This is extremely important as we'll be downloading necessary data and resources from the internet. Any interruptions in the connection might lead to incomplete or corrupt data, which can cause problems later on.
- Administrative access to your computer: Being an administrator gives you the necessary permissions to install new software, modify system files and change settings as required. Without administrative access, you might face issues during the installation or operation of the software.
Once you have these prerequisites sorted out, you're ready to proceed. For additional resources and advanced troubleshooting, you can visit the official Visual Studio Code website. It contains comprehensive guides, tutorials and a helpful community to assist you in your journey.
Installing Visual Studio Code on a Windows System
If you're looking to install the Visual Studio Code (VS Code) on your Windows-based computer, then you've come to the right place. This comprehensive guide provides step-by-step instructions to assist you through the installation process. By following these steps, you can ensure a smooth and successful installation of VS Code on your Windows system.
Step 1: Download the Installer
- Go to the Visual Studio Code download page.
- Click on the "Windows" download button.

Step 2: Run the Installer
- Locate the downloaded
VSCodeSetup.exefile and double-click it to run the installer. - Follow the prompts in the setup wizard:
- Accept the license agreement.
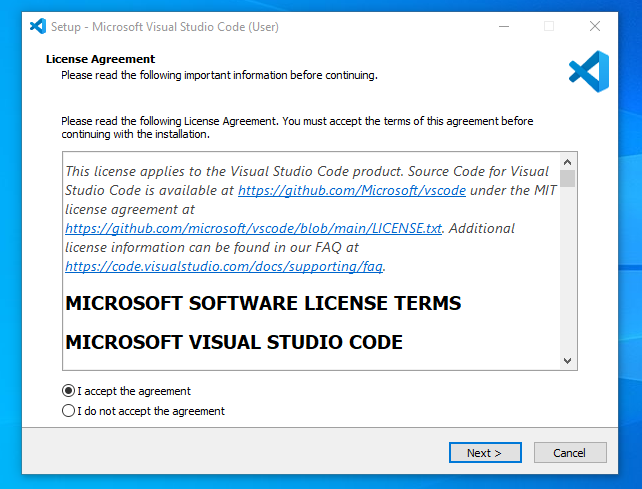
- Select the destination folder.
- Choose additional tasks (e.g., creating a desktop icon).

Step 3: Launch Visual Studio Code
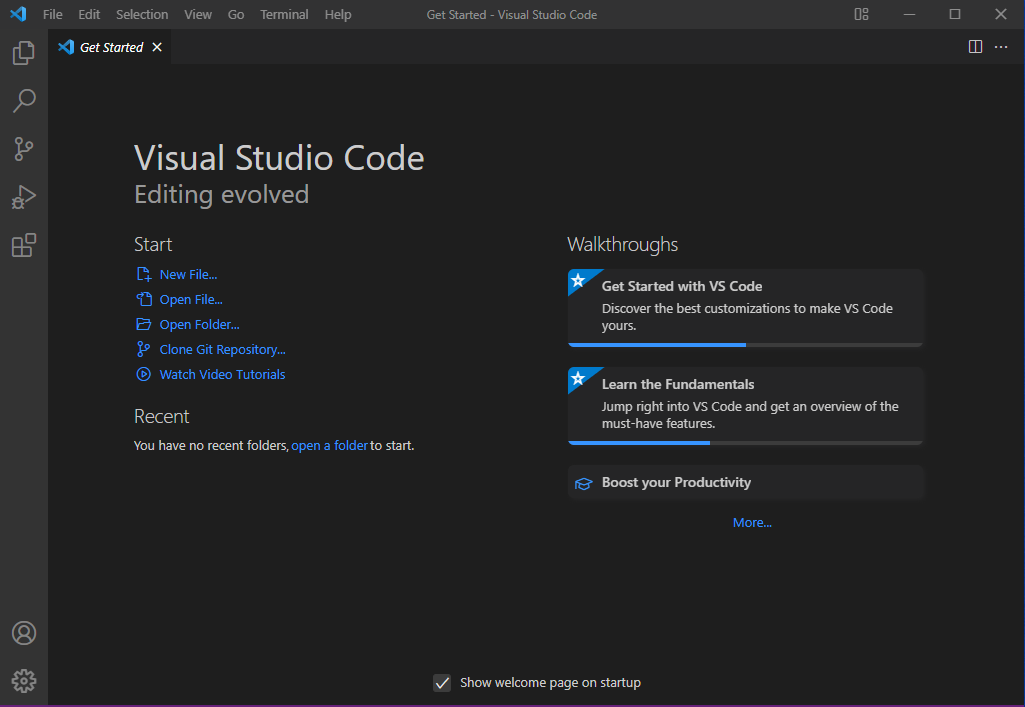
Once the installation is complete, click "Finish" to launch VS Code.

How to Successfully Install Visual Studio Code on a Mac
If you are looking to install Visual Studio Code on your Mac computer, you've come to the right place. This document will guide you through the process of installing Visual Studio Code, commonly known as VS Code, on a system running Mac operating system. The process is straightforward and won't take much of your time.
Step 1: Download the Installer
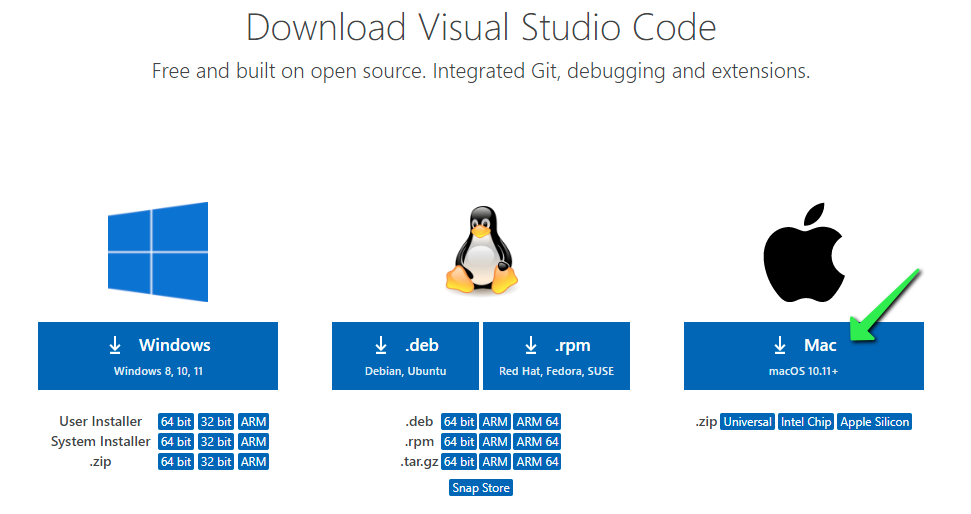
- Visit the Visual Studio Code download page.
- Click on the "Mac" download button.
Step 2: Install Visual Studio Code
- Locate the downloaded
VSCode-darwin-stable.zipfile and open it. - Drag the Visual Studio Code application to the Applications folder.
Step 3: Launch Visual Studio Code
Open the Applications folder and double-click on Visual Studio Code to launch it.

Detailed Guide to Installing VS Code on Linux Systems
The process of installing Visual Studio Code, a popular code editor, on Linux systems can sometimes be a complex task, especially since it can vary depending on the specific Linux distribution being used. In this guide, we will provide detailed instructions covering two types of distributions - Debian-based distributions and Red Hat-based distributions.
For Debian-based distributions, the most well-known of which is Ubuntu, we'll walk you through the necessary steps to successfully install VS Code. Similarly, we'll cover the installation process for Red Hat-based distributions, with Fedora being a prime example, ensuring you have a comprehensive understanding of the procedures required for these systems.
For Debian-based Distributions
Step 1: Download and Install the .deb Package
1. Go to the Visual Studio Code download page.
2. Click on the ".deb" download button.

3. Once the download is complete, open your terminal and run the following command to install the package:
sudo apt install ./<path-to-download>/code_1.xx.x-xxx.debStep 2: Launch Visual Studio Code
After the installation is complete, you can launch VS Code from the terminal by typing:
codeFor Red Hat-based Distributions
Step 1: Download and Install the .rpm Package
- Visit the Visual Studio Code download page.
- Click on the ".rpm" download button.
- Once the download is complete, open your terminal and run the following command to install the package:
sudo rpm -i ./<path-to-download>/code-1.xx.x-xxx.rpmStep 2: Launch Visual Studio Code
After the installation is complete, you can launch VS Code from the terminal by typing:
codeCustomizing Visual Studio Code
Once you have successfully installed Visual Studio Code, or VS Code as it's commonly known, on your personal computer, you have the ability to tailor it to align with your specific development workflow. This powerful feature allows you to optimize your coding experience, making it more efficient and enjoyable.
VS Code offers a wide range of customization options, providing you with the flexibility to adjust your coding environment to your personal preferences, thus creating a workspace that can increase your productivity and enhance your coding skills.
Extensions
Visual Studio Code, or VS Code, supports a plethora of extensions to enhance its functionality, allowing developers to tailor the editor according to their preferences or project requirements. Adding an extension is a simple process:
- Click on the Extensions icon, represented by a square icon located in the Activity Bar on the side of the window. This brings up the Extensions view.
- Once here, you can search for the extension you want to install in the search bar. When you've found the desired extension, simply click "Install" to add it to your VS Code editor.

Themes
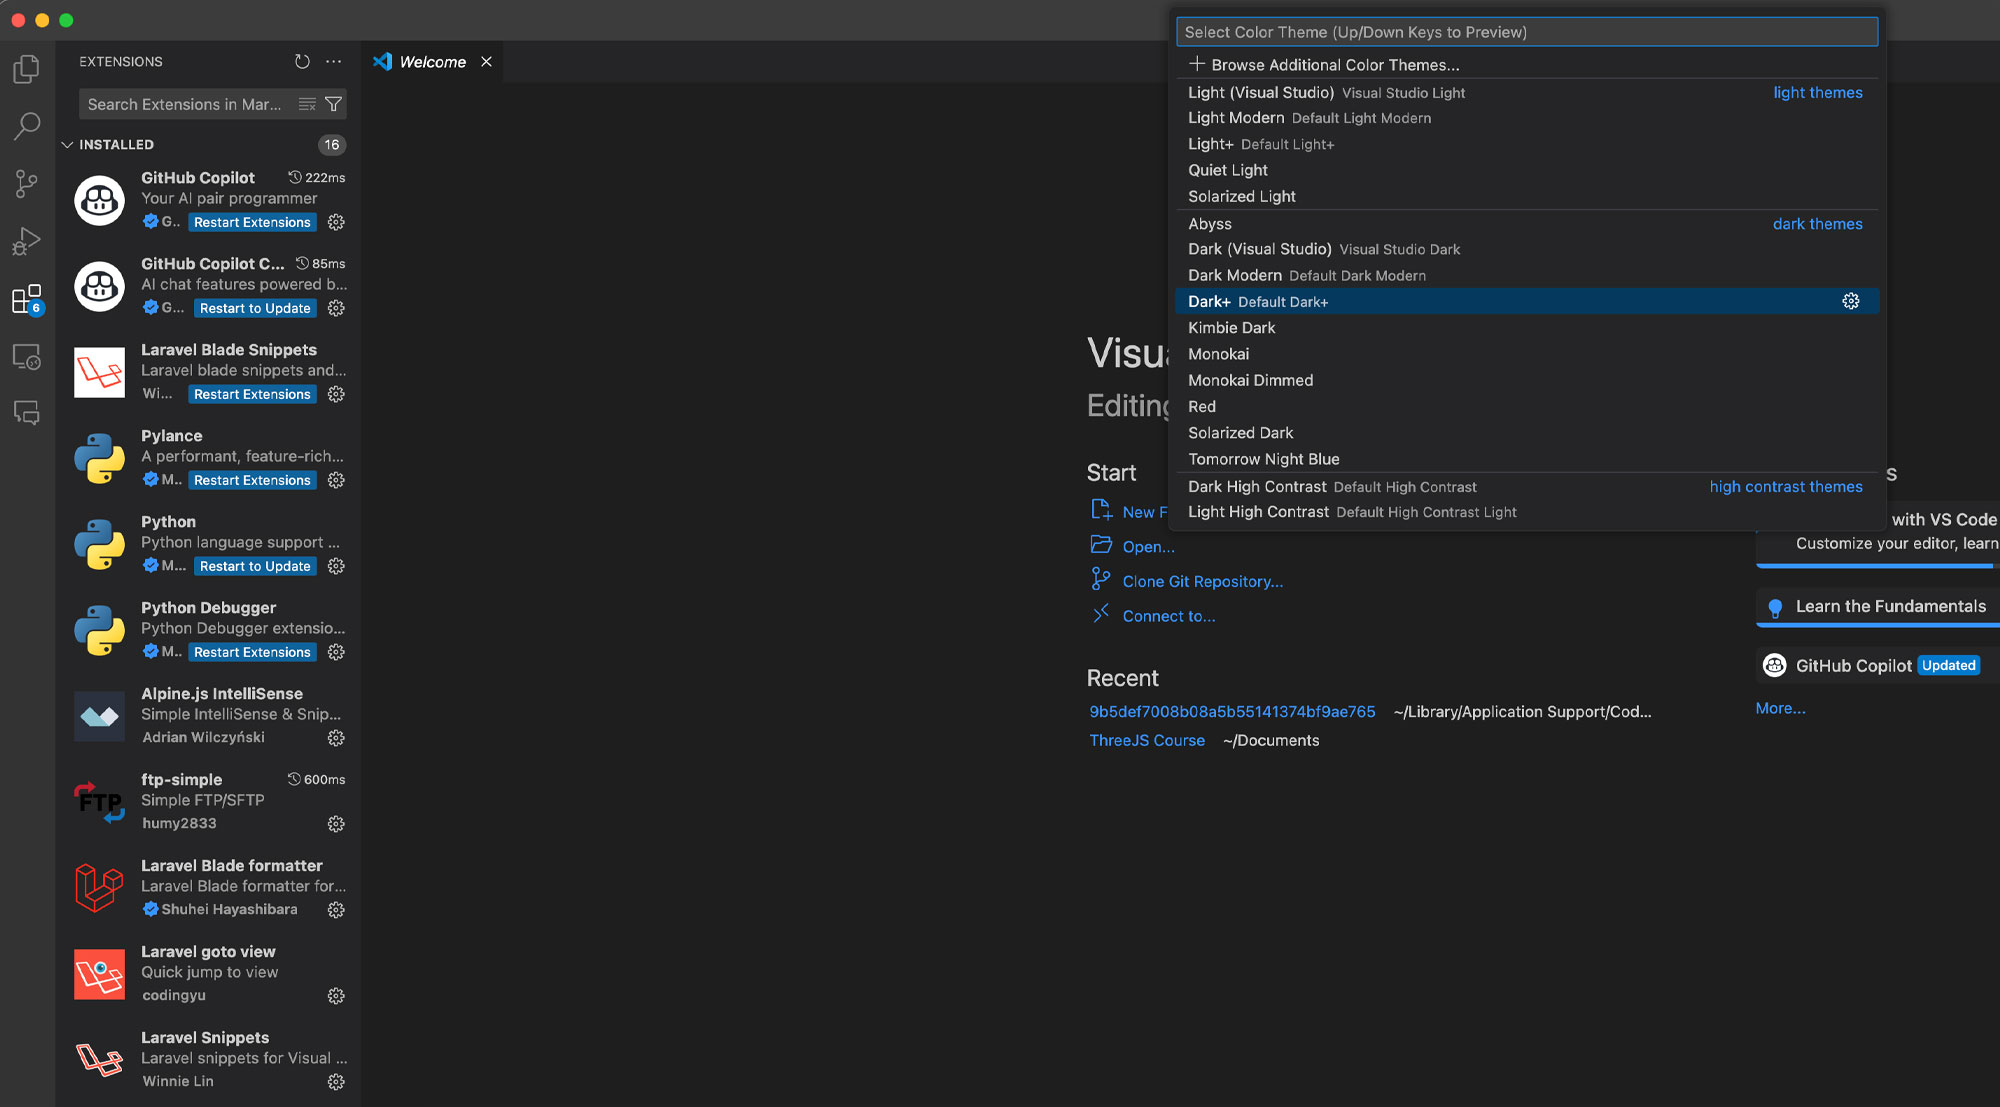
VS Code's interface is also highly customizable, with the option to change the theme of the editor. Here's how you can do it:
- Navigate to File > Preferences > Color Theme. This will display a dropdown list of available themes.
- Scroll through the list and select a theme that suits your preferences. The change will be applied immediately.
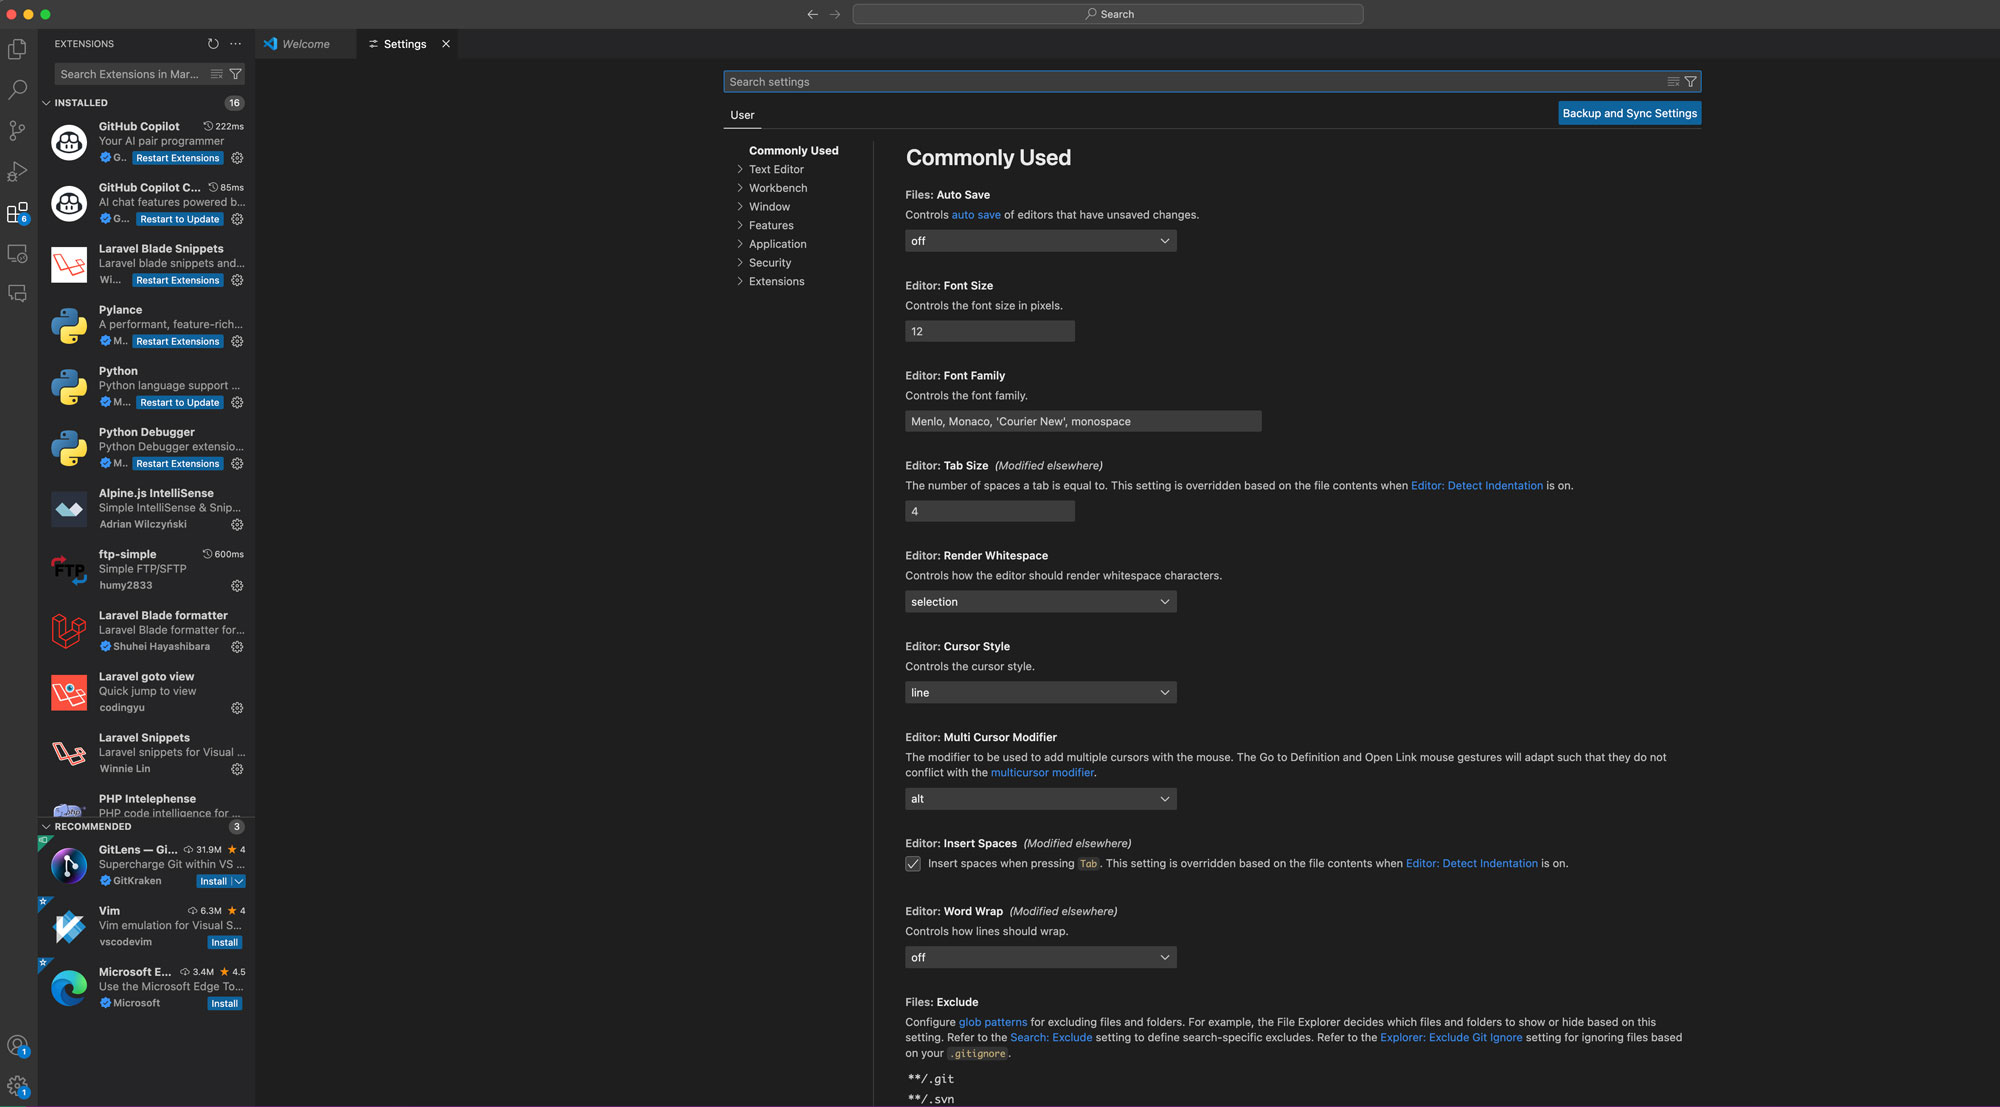
Settings
Apart from extensions and themes, you can also customize a wide array of settings in VS Code to make it truly your own:
- Go to File > Preferences > Settings. This will open a new tab with a search bar at the top.
- Here, you can either search for the specific setting you want to change, or browse through the categories to explore all the customization options available.
Conclusion
In the vast and diverse world of code editors, Visual Studio Code stands out as a versatile and powerful tool that is aptly suitable for all types of development work. Its robust features and flexibility make it a favorite among beginners and experienced developers alike.
This comprehensive guide has walked you through the process of installing and setting up Visual Studio Code on your system, regardless of whether you are using a Windows, Mac, or Linux operating system. As a result, you should now have a fully functional installation of VS Code on your machine, ready to assist you in your programming efforts.
One of the key strengths of Visual Studio Code lies in its flexibility. It offers a wide range of extensions and customization options that can significantly enhance your coding experience. With the ability to tailor VS Code's functionality to your specific needs, you can streamline your workflow and boost your productivity.
Now that you have successfully installed and set up Visual Studio Code, the next step is to explore these features in depth. Familiarize yourself with the various extensions and settings available, and customize your workspace to best fit your personal work style and project requirements.
In conclusion, the power of a code editor like Visual Studio Code can only truly be harnessed when it is correctly set up and customized to cater to the developer's needs. This guide was designed to help you achieve just that. Happy coding!
FAQs
What is Visual Studio Code?
Visual Studio Code (VS Code) is a free, powerful, and lightweight code editor developed by Microsoft, designed for developers with features like debugging, Git control, and intelligent code completion.
How do I install VS Code on Windows?
Download the installer from the Visual Studio Code website, run it, and follow the setup wizard prompts.
How do I install VS Code on Mac?
Download the installer from the Visual Studio Code website, open the downloaded file, and drag the application to the Applications folder.
How do I install VS Code on Linux?
Download the appropriate package (.deb for Debian-based distributions, .rpm for Red Hat-based distributions) from the Visual Studio Code website and install it using the terminal.
How can I customize VS Code?
You can customize VS Code by installing extensions, changing themes, and modifying settings to fit your development workflow.
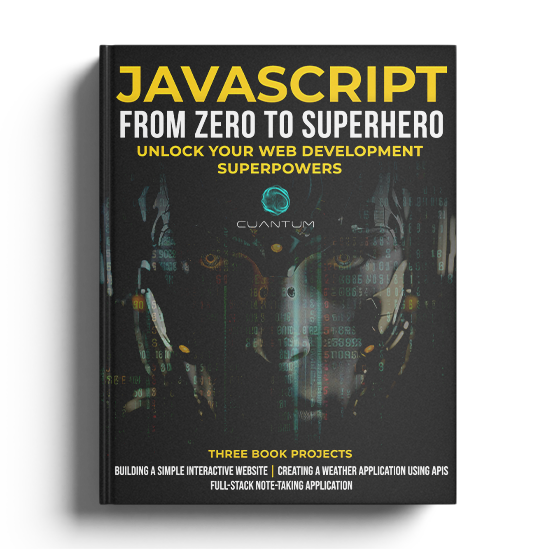
Discover "JavaScript from Zero to Superhero: Unlock Your Web Development Superpowers”
Why Choose This Book?
- Comprehensive Coverage: Covers everything from the fundamentals of JavaScript to advanced topics, ensuring a solid understanding of the language.
- Step-by-Step Instructions: Provides clear, step-by-step instructions to guide you through each concept, making learning easy and enjoyable.
- Practical Exercises: Includes hands-on exercises at the end of each chapter to help you apply what you've learned and build real-world projects.
- Real-World Examples: Features real-world examples that illustrate how to use JavaScript in various web development scenarios.
- Engaging Writing Style: Written in an engaging and accessible style, making complex topics easy to understand.
- Advanced Techniques: Delves into advanced techniques such as asynchronous programming, closures, and JavaScript frameworks to take your skills to the next level.
- Expert Insights: Learn from industry experts who share their tips, tricks, and best practices for mastering JavaScript.
Don't miss out on the opportunity to become a JavaScript superhero. Get your copy of "JavaScript from Zero to Superhero: Unlock Your Web Development Superpowers" today and start building dynamic, interactive web applications with confidence!


